
IDM PowerTips
Find duplicate files between folders with UltraCompare
1. Discover any files inside the folders you specify, then
2. Compare the files against each other to determine which files are duplicates of one another.
Open Find Duplicates dialog
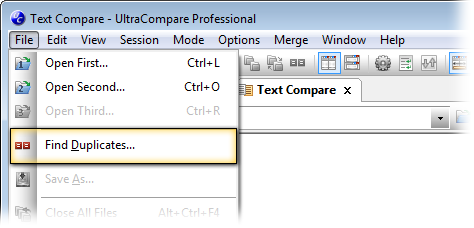
To start your duplicate search, go to File -> Find Duplicatesor click the Find Duplicates button on the main toolbar. The Find Duplicates dialog will open, as shown below.
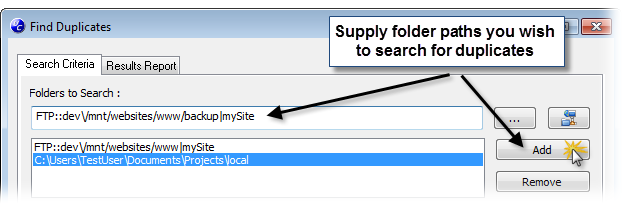
The Find Duplicates dialog is intuitive and easy to use. The first step is to specify which folders should be searched for duplicates. You can either manually type in the file paths or use the browse button (“…”) to browse to and select your folders. If you wish to choose a folder from an FTP site, click the FTP Open button. Click the “Add” button to confirm your selection and add it to the list below. You can add as many or as few folders as you want to search for duplicates.
What is a duplicate file? Well, you can tell UltraCompare what criteria to use when evaluating whether a file is a duplicate or not. The following 4 criteria are available:
Name
Obviously this specifies that duplicates will be evaluated based on the file name. This is checked by default and includes the full file name including the extension, so “my-text-file.txt.bak” will not be considered a name duplicate of “My-text-file.txt” (unless “Ignore file extensions” is enabled in your Ignore Options – discussed later).
Size
Checking this item will cause UltraCompare to check file sizes when searching for duplicates. Click on this item to (optionally) set a minimum and maximum file size for the duplicate search. Any file with a size outside of the range you set will be completely ignored by the Find Duplicates search. This is especially useful for performance if you are doing a content-based search where you want to avoid checking the contents of very large files.
Date
Checking this item will cause UltraCompare to check file timestamps when searching for duplicates. Click on this item to (optionally) set whether UltraCompare checks the Date Created, the Date Modified, or both (default).
Content
Checking this item will cause UltraCompare to scan and evaluate each file’s entire contents when checking for duplicates. This scan uses the same technique as a fast binary compare. Caution: scanning file contents may require substantially more system resources and more time depending upon the amount and size of files to be searched.
You can further refine your duplicate search with ignore options. You can configure these options directly beneath the duplicate criteria settings. Click on an ignore option group in the listbox to the left to activate that group’s specific options. The following groups of ignore options are available:
Advanced
The “Advanced” ignore options are self-explanatory and useful to avoid deleting important Windows/system files.
Include Filter
This allows you to restrict what files are included in the search. This uses a Windows-based file filter, so if you wanted to search only .txt files, you would specify “*.txt” (without the quotes) here. Additionally, you can specify file names with wildcards, for example: “ultra*” (without the quotes) will search only files with names beginning with “ultra”. If you add two filters then only files matching both filters will be searched. So the previous two examples would cause Find Duplicates to search only files beginning with “ultra” and ending in “.txt”.
Exclude Filter
Exclude filters work exactly the opposite as include filters. Type any file extension or file name (with or without the “*” wildcard) you want to exclude from being searched.
Exclude Folders
This ignore option allows you to set filters for folders to exclude from searching for duplicates. For instance, if you want to exclude all .svn folders, you could add “*.svn”. If you want to exclude all folders named “bak”, then you would simply type “bak” (without the quotes) and add it. Note that this is a filter, so all folders with names matching the filter will be excluded.
Once you’ve specified your folders for searching, and you’ve set your duplicate criteria and ignore options, click “Start” to initialize the search. UltraCompare will jump to the Results Report page, and progress will be tracked in the progress bar at the bottom of the dialog.
Once the search is complete, you will see a list of all duplicates in the left column labeled “Duplicates Found”. The number of duplicates found follows the file name in parentheses. For example, “file.txt (4)” indicates that there are 4 files named “file.txt” that exist among the folders you specified, and based upon the criteria/ignore options you set.
Tip: Don’t want to delete duplicates without visually inspecting them first? Ctrl + Click any two (or three) files in the “Duplicates Locations” list, then right-click and select “Compare Selected” to open a text compare of those files!

By default, no duplicates are marked for deletion. You must specify which duplicates are to be deleted. To do this, click on a duplicate in the left column and you will see the full list of duplicate files for this entry immediately to the right. This listing also includes size, date, and attributes for each file. Click the checkbox in front of the file path for each duplicate you want UltraCompare to delete. If you wish to keep a file, leave the checkbox unchecked.
Once you’ve gone through your list of duplicates and double-checked the files you wish to delete and those you wish to keep, click “Delete Checked”. That’s it – specified duplicates have now been removed!