

Consider a legal firm or an insurance company that needs to scan and store hundreds of client contracts, each consisting of multiple pages. Using multi-page TIFF files, each contract can be scanned and stored as a single file.
This greatly simplifies the process of filing, retrieving, and managing these documents. When a lawyer needs to review a contract, they can quickly access the entire document through one file, ensuring that no pages are missing or misfiled.
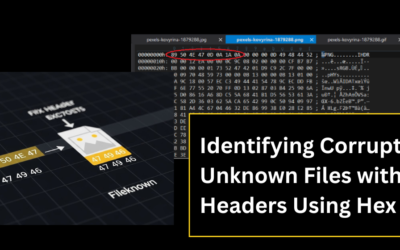
In this blog post, we show how to split a multi-page or multi-image TIFF file into its constituent images for better file management or editing. As an example we are working with a series of scanned images of documents with important metadata. So in this case, using a hex editor to split the files would be most appropriate.
The basics of TIFF files
TIFF files serve as a preferred format for instances where maintaining the quality and fidelity of images is essential. That is why TIFF files are commonly used for scanned documents which hold a lot of detail. They also compress losslessly—you can save and open them repeatedly without losing data (as opposed to .jpg). They are commonly used to store scanned business records, patient files, student files, and government records.
TIFF files are also designed to be extremely flexible and can include multiple images (or “pages”) within a single file. A single file can have an integrated directory that points to different images within the file providing an efficient solution for grouping multiple documents or image collections into one file.
For instance, this allows each page of a scanned document to be stored as a separate image within the same TIFF file. This structure is particularly suited to document management systems where the handling of multi-page documents is frequent.
Reasons for using a hex editor to split TIFF Files
- To be able to work on individual images.
TIFF files offer the benefit of storing multiple pages in a single file. However, this convenience can be a drawback when we need to access just one page from a twenty-page TIFF. When we need to work with individual TIFF images from a multi-page TIFF, we must split the file into separate single-page TIFF files, which operate independently. - Allows manipulation of non-graphic metadata.
Apart from graphical data that you edit in image editing software, TIFF files may also contain rich metadata in the form of tags. A hex editor can be used to directly edit or remove metadata without the need for specialized software. This can be useful for privacy reasons (removing GPS data, for example) or for correcting erroneous metadata. - Opening large files.
TIFF files can be compressed but they can still be over 1.5 GB in size, especially if you have layers upon layers of image data. Opening and editing these files in binary mode makes it easier to access specific parts without overloading limited software memory (e.g. Photoshop, GIMP, Photo viewer).
Key ideas:
- TIFF files can store multiple images in one file, making them ideal for scanned multi-page documents.
- Hex editors allow direct manipulation of file structure, giving you precise control over how you extract and split multi-page TIFFs.
- Identifying and extracting individual image pages requires understanding TIFF headers, IFDs, and tag values like StripOffsets and StripByteCounts.
- This guide provides a hands-on, beginner-friendly walkthrough using a sample TIFF file, so you can practice and apply each step confidently.
.
Understanding the TIFF file format
To split a multi-page TIFF using a hex editor, it’s helpful to understand how the format works under the hood. Don’t worry—this will be a high-level overview, so even if you’re new to file structures or hex editing, you’ll be able to follow along.
What makes a TIFF multi-page?
TIFF (Tagged Image File Format) is a flexible image format that can store multiple images—or pages—within a single file. This makes it ideal for scanned documents or grouped image sets. Unlike other formats, a multi-page TIFF doesn’t just stack images visually—it embeds each image as a separate data structure within the file.
The role of TIFF headers
At the beginning of a TIFF file, there’s a header that defines how the rest of the file is organized. This includes byte order (little or big endian), version information, and a pointer to the first Image File Directory (IFD). Each IFD contains metadata and image data pointers, and when multiple images are present, each one has its own IFD linked sequentially.
These IFDs are what you’ll be looking for when working in hex mode inside UltraEdit. Identifying the start and end of each IFD helps you isolate individual pages.
TIFF structure in hex
When you open a TIFF in a hex editor like UltraEdit, you’ll see hexadecimal values that represent the file’s binary content. You don’t need to decode every byte—instead, focus on patterns like:
- Header Start: Usually begins with 49 49 2A 00 (little endian) or 4D 4D 00 2A (big endian).
- IFD Offsets: These are pointers that lead to where each image’s metadata begins.
- Next IFD Pointer: Found at the end of each IFD, it tells the file where the next image begins.
By recognizing these markers, you’ll be able to confidently navigate and extract sections of the TIFF file in UltraEdit.
Step-by-step guide: Splitting the TIFF file using UltraEdit
After learning about TIFF file structure, we will describe how to split them using UltraEdit’s hex editor. The process includes finding the boundaries between images, copying the relevant data, and saving each as a new TIFF file.
If you are new to hex mode, don’t worry—we will break each step down clearly.
Getting Started: Download the sample multi-page TIFF
But before diving into a hex editor, let’s get set up with a sample file that you can use to follow along. To make this guide practical and hands-on, we’ve provided a sample multi-page TIFF file that contains a few distinct image pages—perfect for learning how to identify and extract them using hex mode.
In this particular example, we are using UltraEdit’s integrated hex editor.
Get the sample TIFF file here.

Sample multi-page TIFF file
Once downloaded, here’s how to open it in UltraEdit’s Hex Editor:
- Launch UltraEdit.
- Click on File > Open, and browse to the location of the downloaded .tiff file.
- When prompted, choose to open the file in Hex Mode or check the Open as binary checkbox to view the raw hexadecimal structure.
This TIFF file is intentionally kept small and clean. So you can focus on the splitting process without being overwhelmed by file complexity. It includes multiple image entries, allowing you to clearly see how a multi-page TIFF is structured inside a hex editor.
By working with this file directly, you’ll be able to apply each step in this guide in real time. This makes the learning process smoother and far more effective
Step 1: Open the TIFF file in UltraEdit
- Launch UltraEdit.
- Go to File > Open and select the sample multi-page TIFF file you downloaded earlier.
- When prompted, choose to open the file in Hex Mode or check the Open as binary checkbox (if you have not enabled automatic hex mode). You’ll now see the file’s raw hexadecimal structure in the editor.
- Scroll to the top to locate the TIFF header. It typically starts with:
- 49 49 2A 00 for little-endian format (Intel)
- Or 4D 4D 00 2A for big-endian format (Motorola)
These bytes confirm that the file is a valid TIFF.

A multi-page TIFF file opened in hex mode in UltraEdit hex editor
Step 2: Identify image boundaries
In multi-page TIFF files, each embedded image is defined by an Image File Directory (IFD)—a block of metadata that tells the file viewer where the image data is located and how it should be read.
The TIFF file begins with a header, which includes a 4-byte offset pointing to the start of the first IFD. Each IFD contains multiple entries (typically 12 bytes each), and at the end of each IFD, there’s a pointer to the next IFD. This is how the file links multiple images together. When that pointer value is 00 00 00 00, you’ve reached the final image in the file.
How to identify IFDs in UltraEdit
We will use our sample TIFF file in this explanation. When we open our TIFF in UltraEdit’s Hex Mode, here’s what we’ll see at the top:
hex
00000000h: 49 49 2A 00 08 00 00 00 …
Let’s break it down:
- 49 49 → Byte order (little-endian)
- 2A 00 → TIFF magic number
- 08 00 00 00 → Offset to the first IFD (located at byte 0x00000008)
First IFD found
At offset 0x08, you’ll see:
hex
00000008h: 0B 00 …

Offset to the first IFD
This means:
- 0B 00 = The first IFD has 11 entries (since the byte order is little-endian, it’s hexa decimal 00 0B and it equals to the decimal number 11)
- Each entry is 12 bytes, so the total size of the IFD is 132 bytes
- These entries end around 0x08 + 132 = 0x08 + 0x84 = 0x8C
Immediately after this block (at 0x8C), you’ll find a 4-byte pointer to the next IFD, which starts the next image’s metadata.
Key tags to trace image boundaries
Inside each IFD, two key tag entries define where the image starts and how long it is:
1.StripOffsets (0x0111)
This tag tells you where the image data begins.
In our file:
hex
Offset 00000046h: 11 01 04 00 01 00 00 00 60 02 00 00
→ 0x0260 = 608

StripOffsets of the first image
The first image starts at byte 608
How to read the data:
| Field | Value | Meaning |
| Tag ID | 11 01 → 0x0111 | This is the StripOffsets tag |
| Data Type | 04 00 → LONG | Each value is 4 bytes |
| Count | 01 00 00 00 → 1 | One value (1 image strip) |
| Value (Bytes) | 60 02 00 00 | Little-endian = 0x0260 = 608 |
StripByteCounts (0x0117)
This tag tells you how many bytes to read.
In our file:
hex
Offset 0000006Ah: 17 01 04 00 01 00 00 00 00 F8 7F 00
→ 0x007FF800 = 8,386,560 bytes
The first image is 8,386,560 bytes long
How to read the data:
| Field | Value | Meaning |
| Tag ID | 17 01 → 0x0117 | This is the StripByteCounts tag |
| Data Type | 04 00 → LONG | Each value is 4 bytes |
| Count | 01 00 00 00 → 1 | One value (1 image strip) |
| Value (Bytes) | 00 F8 7F 00 | Little-endian = 0x007FF800 = 8,386,560 bytes |

StripByteCounts of the first image
How to identify the image data
After reading StripOffsets and StripByteCounts, you know:
- Start of image = 0x0260
- StripByteCounts = 0x007FF800 = 8,386,560 bytes
- End of image = 0x7FFA5F

Starting byte of the first image (0x0260)

Ending byte of the first image (0x7FFA5F)
To find the next image:
- Look for the next IFD offset after the current one (found at the end of the IFD structure)
- Repeat the process: find 0111, get offset; find 0117, get length
Tips for navigating in UltraEdit
To make this process easier:
- Use Find (Ctrl + F) to search for:
- 2A 00 (commonly part of TIFF structure tags)
- Tag identifiers like 11 01 (StripOffsets) or 17 01 (StripByteCounts)
- Look for repeating IFD layouts:
- Each starts with a 2-byte count of entries
- Followed by repeating 12-byte blocks
- Watch for data block gaps:
- Changes in hex structure or long data segments often mark image boundaries
Step 3: Copy image data to new files
Once you’ve identified where an image starts and ends:
1. Create a new file in UltraEdit (File → New) and put it in the Hex Edit mode.

New file in UltraEdit in Hex edit mode
2. Copy Header + IFD + Image Data
-
- Select bytes from 00000000h (start of file) to 0000025Fh (end of IFD block).
- Then select bytes from 00000260h to 007FFA5Fh (image data).
- Copy and paste them into a new file (make sure you’re still in Hex Mode).

Page1 TIFF file in hex mode
Step 4: Save each image as a separate TIFF
After pasting the hex data into a new file:
- Go to File → Save As.
- Choose a filename like page1.tiff, page2.tiff, etc.
- Ensure the file extension is .tiff.
- Save the file.
Verifying the Output TIFF Files
Let’s open our Page1.tiff in an image viewer to verify it works properly.

Page1 TIFF file opened in an image viewer
Download the Page1.tiff file and check it out for yourself.
Repeat Steps 2–4 in the previous section for each image in the multi-page TIFF until you’ve extracted all pages into separate files.
Pro Tips:
- Use UltraEdit’s search tools to navigate and work with large files more efficiently.
- After saving each TIFF, try opening it in an image viewer to verify it works correctly.
- If a TIFF doesn’t open, double-check your start and end offsets—it’s likely a byte alignment issue or a missing header.
Conclusion
By following this guide, you’ve learned how to open a multi-page TIFF file, how to identify individual image boundaries using key TIFF tags, and how to extract each page into a standalone, fully functional TIFF file.
UltraEdit’s ability to handle large files effortlessly, its intuitive hex editing interface, and its powerful search tools make locating image data straightforward. It’s also a text editor that places emphasis on security and compliance—very useful for industries involved with sensitive client data.
Now that you’ve explored TIFF splitting, we encourage you to dive deeper into UltraEdit’s Hex Capabilities—whether it’s inspecting binary logs, cleaning corrupted files, or reverse-engineering data formats. You’ll be surprised at how much control you can gain by learning to work directly with the bytes.
Have questions or want to share your experience? Drop a comment or reach out—we’d love to hear how you’re using UltraEdit in your workflow.
Ready to take full control of your files?
Whether you’re splitting multi-page TIFFs or debugging complex binary structures, UltraEdit puts professional-grade hex editing right at your fingertips.
Start exploring UltraEdit’s powerful Hex Editor today and experience the difference for yourself.
Download UltraEdit Now


0 Comments